Tuesday, September 27, 2011

Canned Pears

I love this time of year! 
I have so many memories of standing at the kitchen sink helping my Mom bottle fruit.
This is how we do pears at our house...

In clean and sterile quart jars add about 3 inches of HOT water at 1/3 cup sugar, stir until sugar is dissolved.
Add some cold water to your sink with the stopper in place.  Blanch pears for 20-25 seconds in a pot of boiling water.  After blanching place pears in the cold water.  The skin of the pears should now slide off with your hands.  Cut the pear in half lengthwise and use a spoon to clean out the seeds, stem and strings.  You can either place the halves in the prepared quarts or cut again lengthwise for quarters.  Fill the jar with pears making sure to not have any pears or liquid in the neck of the jar.  If more liquid is needed to cover the pears add additional water.  Once all of your jars are filled, use a wet cloth to clean the tops of the jars - anything on the rim can prevent the jars from sealing correctly.  Next place your lids in a small saucepan of boiling water for 60 seconds and then using tongs pull out a lid, place it in a ring and screw it onto the jar.  Repeat for all of your jars.  Now on to processing.  It can be different based on if you are using a steamer or a waterbath and your elevation.  But, I process mine for 30 minutes. 

Friday, September 23, 2011

Scotcheroos

Scotcheroos

1 cup Karo Syrup
1 cup Sugar
6 cups Rice Krispies
1 cup Creamy Peanut Butter
1 cup Chocolate Chips
1 cup Butterscotch Chips

You will need 6 cups of rice krispies measured into a large bowl.

1 cup white sugar...

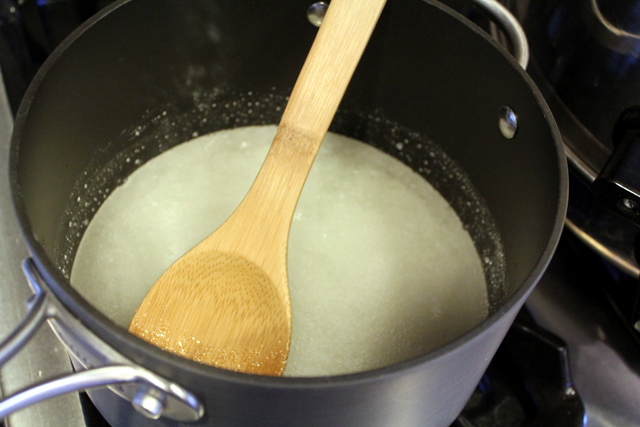
and 1 cup Karo syrup in a sauce pan.

Cook syrup and sugar in the sauce pan over medium heat, stirring constantly to dissolve sugar.  Bring mixture to a boil, remove from heat.  Add 1 cup creamy peanut butter and mix well.  Pour mixture over rice krispies and fully incorporate, then press mixture into a greased 9x13 cake pan.

Using the same saucepan melt 1or1 and 1/2 cup chocolate chips and butterscotch chips over low heat - be careful to stir and not burn the chocolate.  Once melted immediately pour over cereal mixture and smooth with a spatula.  Let cool for 45 minutes, or until firm.  Cut and enjoy!


Friday, July 15, 2011

Jeni's Vanilla Bean Ice Cream

This is not one of those throw it all in and 30 minutes later you have ice cream recipes... this is not a hard recipe but it does require you to let it freeze for 4 hours (4 of the most impatient hours ever!)

Jeni is a legend in Ohio and soon to be everywhere.  Her ice cream is amazing!  Honestly - the BEST vanilla ice cream I've had in my life... the lick the bowl and the spoon and maybe your neighbors bowl kinda good.
We had this for dessert the other night with some fresh strawberries and chocolate sauce and it made my son sing and dance and run around the frontroom exclaiming how good it was and how I was the best cook EVER... See?  This is some serious ice cream. 

It's smooth - you don't end up with butter fat on the roof of your mouth and there is no weird aftertaste. Just trust me and give this recipe a try.

 
Jeni's Vanilla Bean Ice Cream


• 2 Cups Milk
• 1 and one fourth cup cream
• Two thirds (2/3) cup sugar
• scant 1/8 cup corn syrup
• 1 TBS + 1 tsp cornstarch
• 1 and one half ounce cream cheese, softened
• one eighth tsp kosher salt
• One vanilla bean
Use one eighth cup of the milk to blend with the cornstarch and make a slurry. Set aside.In a medium bowl (2 qt.), whisk the very soft cream cheese until smooth.Combine remaining milk, cream, sugar and corn syrup in a four quart saucepan (three quart works, but you have to watch carefully because it can boil over).
Split the vanilla bean lengthwise and open, scrape out seeds and add the seeds and the pod the pan with the cream. Stir to break up. Heat over medium until boiling. Let cream mixture boil for 4 minutes (set a timer). Remove from heat.
SLOWLY add cornstarch slurry in a steady stream while whisking constantly to prevent the slurry from sinking to the bottom of the pan. Once incorporated, return pan to medium heat and bring to a rolling boil. Remove from heat.
Pour about two tablespoons of the hot mixture into the cream cheese. Whisk vigorously until completely smooth. Add a little more cream mixture and whisk. Add the rest of the cream mixture and stir until incorporated. Add salt and mix until well blended (about a minute).Pour entire mixture into a heatproof plastic bag (Ziplock) and get all the air out (to prevent a film forming). Close tightly and submerge in an ice bath until completely chilled, about 30 minutes.
Freeze in an ice cream machine according to manufacturer’s directions.Quickly remove ice cream from machine to a bowl with tight fitting lid. Get it into your freezer asap and freeze for at least four hours.If it becomes too hard to scoop, temper the ice cream for a few minutes at room temperature or in the refrigerator before serving.


Sunday, July 3, 2011

Orange Cream Cookies

2 cups flour
3/4 tsp baking soda
1/2 tsp salt
1 cup (2 sticks) butter, softened
1/2 white sugar
1/2 firmly packed brown sugar
2 large eggs
1 tbsp vanilla
2 tbsp orange zest and the juice of one orange
2 cups white chocolate chips
(to half the batch I added dried carnberries)

Preheat over to 375 degrees.

In a small bowl combine flour, baking soda, and salt - set aside.  In mixer cream butter and sugars together, beet in eggs and then vanilla until smooth.  Gradually add half of flour mixture add orange juice and mix and then add the rest of the flour.  Stir in orange zest, chocolate chips and cranberries.

Drop rounded teaspoonfuls onto ungreased cookie sheets - do not flatten the cookies.  Bake 8-10 minutes.  Do not overcook. Cookies will be thick.  Store in an airtight container.

Note:  These cookies have a short bread type texture.  If your dough still seems too dry add a tbsp of milk.

*Adapted from the Girl Who Ate Everything.

Monday, June 27, 2011

Chicken Pot Pie with Chive Pepper Biscuits

This recipe is from Joy the Baker and is fabulous!
If you want to feel like a really good wife make this and follow it up with some fresh out of the oven cookies and you will have a happy man...
Guaranteed!
You maybe thinking about taking a short cut and not making the biscuits from scratch... don't do it!  It wasn't too tough.  You can do this - I promise!
*I did less squash and I added celery too.

Wednesday, June 22, 2011

Quick and Easy Fruit Dip

This is a summer staple at our house.  Definately not swimsuit friendly, but totally worth it!
1 (8 oz.) jar of marshmallow cream
1 (8 oz.) brick of cream cheese, softened
1 small container of cool whip

Mix the marshmallow cream and cream cheese with hand mixer until smooth. Then mix in the cool whip. Serve with your favorite fruit.

*My families favorites are canteloupe, strawberries and watermelon.

Thursday, June 2, 2011

Thank You Treats

I need to be better about making treats during daylight hours, then maybe my pictures wouldn't be so yellow - Sorry!

So this is not a fantastic angle but the squares are on top of rounds to look like graduation caps.

I made these for Jaxon's kindergarten teacher.  She is fantastic!  His school colors is green, they are dragons.  These are oreo truffles, dipped in green candy melts and the square is a graham cracker dipped in candy melts.

LinkWithin

Related Posts with Thumbnails