Monday, October 17, 2011

Thick Pumpkin Pie Filling (For Pie Pops)


Pumpkin Pie Pops
1.5 c pumpkin puree
1/2 c sugar
3 tbsp melted butter
1 egg
1/2 tsp vanilla
1/2 tsp cinnamon
1/4 tsp ginger
1/4 tsp ground cloves
1/4 tsp salt
1/4-1/2 cup toasted pecans (optional)

In a bowl, mix everything. Mix well until incorporated. Pumpkin pie pops need to cook about 5 minutes longer than fruit filled pie pops.

Sunday, October 16, 2011

Pie Pops - How to

• Pie Dough
• Filling
• Craft sticks or Lollipop Sticks
• 1 egg white, beaten
• 1 teaspoon sugar
• 1/3 cup powdered sugar, if desired for drizzle
• 2 to 3 teaspoons milk, if desired for drizzle
• 3 inch round cutter**

Step 1: The dough
For premade dough dust counter with flour and unroll, for homemade dough make sure you roll it out thin.
Step 2: The filling
Make or buy your favorite pie filling.
Step 3: Roll, cut and fill
Using a 3 inch round cutter**, cut out 16 rounds (8 rounds per crust). Place 8 rounds on ungreased cookie sheet. Spoon a 1-2 teaspoons filling evenly onto each round to within 1/2 inch of edge. Place 1 craft stick or lollipop stick in filling of each.


Step 4: Top off the Pops

Flatten remaining rounds to 4 inches in diameter. Brush underside of each round with egg white; place over filling. Press edges together; seal with fork. Cut small slit on top of each. Brush tops with egg white; sprinkle with 1 teaspoon sugar, dividing evenly among pops.

Step 5: Bake
Bake at 400°F for 10 to 13 minutes or until golden brown. Remove from cookie sheet to cooling rack; cool 10 minutes before serving. Do not handle by the stick until completely cool and the filling has had time to set.
Step 6: Drizzle (Optional)
Mix powdered sugar and milk until smooth, adding milk until thin enough to drizzle. Drizzle over pops and let stand until set, about 30 minutes.

**Instead of 3 inch circles you can cut them into heart shapes or smaller circles, etc.

Sunday, October 9, 2011

Pumpkin Oreos

This is an easy and cute idea for parties or as a small gift or thank-you.
You will need:
Lollipop Sticks
Orange Candy Melts
Oreo Cookies
Black Candy Melts (Optional)
Green Fondant (Optional)
Pretzels (Optional)

1. Line a cookie sheet with parchment paper. Then open up the oreos and using a little of the melted orange attach the stick to the inside of the Oreo and close back up.  I put these in the freezer to set for about 5 minutes - I found it was easiest to work in batches.  While some were in the freezer I was adding sticks to others in preparation of sticking them in the freezer.  If you want to have "stems" on your pumpkins you will need to break apart a few pretzels and have them ready to go in a bowl.

2. Melt the orange wafers in a small deep bowl or a cup.  Take the set-up Oreo on a stick and dip it in the orange, all the way up to the stick, make sure to cover it all and then tap off any excess.  Place the Oreo on the parchment paper cookie sheet - if you are adding stems do it now while the chocolate is still wet.  Repeat.  Set aside to firm up/dry - you can put in the freezer to speed up this process.
3. If adding leaves, roll out prepared green fondant and cut out a leaf shape/ tear drop shape and then squeeze it around the stem to attach.
4. Once set feel free to add scary faces, words or any other design you fancy with black melted wafers of black royal icing.

All wrapped up and ready to go.

Happy Halloween.

Tuesday, October 4, 2011

Raspberry Muffins/ Peach Muffins

These were great!  Super moist and with great flavor.  I made these with raspberries and with peaches since I had both on hand.  I also added streusel topping to some of them.  I prefer the streusel on the peach and raspberry plain, but all of the options were yummy.

Raspberry Muffins


  • 1/2 cup vanilla yogurt (you can use plain or lemon) 


  • 3 tablespoons vegetable oil


  • Juice from one lemon


  • 2 eggs


  • 1 1/2 cups all-purpose flour


  • 3/4 cup white sugar


  • 2 teaspoons baking powder


  • 1/4 teaspoon salt


  • 1 teaspoon grated lemon zest


  • 1 cup fresh raspberries (can use frozen)


  • 2 tablespoons white sugar for decoration (optional)

  • Preheat the oven to 400 degrees F (200 degrees C). Grease a 12 cup muffin tin, or line with paper liners.
    In a large bowl, mix together the yogurt, oil, lemon juice, eggs, and, lemon juice. In a separate bowl, stir together the flour, 3/4 cup sugar, baking powder, salt, and lemon zest. Add the wet ingredients to the dry, and mix until just blended. Gently stir in the raspberries. Spoon batter evenly into the prepared muffin cups. Sprinkle remaining sugar over the tops for decoration, if desired. Or spoon over strussel topping.

    Bake for 15 to 17 minutes in the preheated oven, or until the top springs back when lightly touched. Cool muffins in the tin on a wire rack.


    Peach Muffins

    I followed the same recipe as above, but I omitted the lemon juice, zest and of course the raspberries and added in 1 tablespoon cinnamon, and a little milk for some added moisture and then 2 cups pealed and diced peaches.

  • 1/2 cup vanilla yogurt


  • 3 tablespoons vegetable oil


  • 2 eggs


  • 1 1/2 cups all-purpose flour


  • 3/4 cup white sugar


  • 2 teaspoons baking powder


  • 1/4 teaspoon salt


  • 1 tablespoon cinnamon 


  • 2 cups pealed and diced peaches 


  • 1/4 cup milk


  • strussel topping (optional)

  • Strussel Topping


  • 1 cup brown sugar 


  • 6 tablespoons softened butter


  • 1 1/2 tsp. cinnamon


  • Chopped walnuts nuts (optional)

  • Mix ingredients with fork until clumpy spoon over muffins before baking.

    Tuesday, September 27, 2011

    Canned Pears

    I love this time of year! 
    I have so many memories of standing at the kitchen sink helping my Mom bottle fruit.
    This is how we do pears at our house...

    In clean and sterile quart jars add about 3 inches of HOT water at 1/3 cup sugar, stir until sugar is dissolved.
    Add some cold water to your sink with the stopper in place.  Blanch pears for 20-25 seconds in a pot of boiling water.  After blanching place pears in the cold water.  The skin of the pears should now slide off with your hands.  Cut the pear in half lengthwise and use a spoon to clean out the seeds, stem and strings.  You can either place the halves in the prepared quarts or cut again lengthwise for quarters.  Fill the jar with pears making sure to not have any pears or liquid in the neck of the jar.  If more liquid is needed to cover the pears add additional water.  Once all of your jars are filled, use a wet cloth to clean the tops of the jars - anything on the rim can prevent the jars from sealing correctly.  Next place your lids in a small saucepan of boiling water for 60 seconds and then using tongs pull out a lid, place it in a ring and screw it onto the jar.  Repeat for all of your jars.  Now on to processing.  It can be different based on if you are using a steamer or a waterbath and your elevation.  But, I process mine for 30 minutes. 

    Friday, September 23, 2011

    Scotcheroos

    Scotcheroos

    1 cup Karo Syrup
    1 cup Sugar
    6 cups Rice Krispies
    1 cup Creamy Peanut Butter
    1 cup Chocolate Chips
    1 cup Butterscotch Chips

    You will need 6 cups of rice krispies measured into a large bowl.

    1 cup white sugar...

    and 1 cup Karo syrup in a sauce pan.

    Cook syrup and sugar in the sauce pan over medium heat, stirring constantly to dissolve sugar.  Bring mixture to a boil, remove from heat.  Add 1 cup creamy peanut butter and mix well.  Pour mixture over rice krispies and fully incorporate, then press mixture into a greased 9x13 cake pan.

    Using the same saucepan melt 1or1 and 1/2 cup chocolate chips and butterscotch chips over low heat - be careful to stir and not burn the chocolate.  Once melted immediately pour over cereal mixture and smooth with a spatula.  Let cool for 45 minutes, or until firm.  Cut and enjoy!


    Friday, July 15, 2011

    Jeni's Vanilla Bean Ice Cream

    This is not one of those throw it all in and 30 minutes later you have ice cream recipes... this is not a hard recipe but it does require you to let it freeze for 4 hours (4 of the most impatient hours ever!)

    Jeni is a legend in Ohio and soon to be everywhere.  Her ice cream is amazing!  Honestly - the BEST vanilla ice cream I've had in my life... the lick the bowl and the spoon and maybe your neighbors bowl kinda good.
    We had this for dessert the other night with some fresh strawberries and chocolate sauce and it made my son sing and dance and run around the frontroom exclaiming how good it was and how I was the best cook EVER... See?  This is some serious ice cream. 

    It's smooth - you don't end up with butter fat on the roof of your mouth and there is no weird aftertaste. Just trust me and give this recipe a try.

     
    Jeni's Vanilla Bean Ice Cream


    • 2 Cups Milk
    • 1 and one fourth cup cream
    • Two thirds (2/3) cup sugar
    • scant 1/8 cup corn syrup
    • 1 TBS + 1 tsp cornstarch
    • 1 and one half ounce cream cheese, softened
    • one eighth tsp kosher salt
    • One vanilla bean
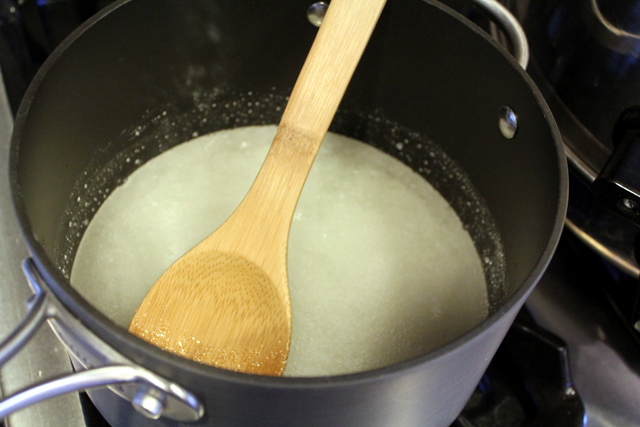
    Use one eighth cup of the milk to blend with the cornstarch and make a slurry. Set aside.In a medium bowl (2 qt.), whisk the very soft cream cheese until smooth.Combine remaining milk, cream, sugar and corn syrup in a four quart saucepan (three quart works, but you have to watch carefully because it can boil over).
    Split the vanilla bean lengthwise and open, scrape out seeds and add the seeds and the pod the pan with the cream. Stir to break up. Heat over medium until boiling. Let cream mixture boil for 4 minutes (set a timer). Remove from heat.
    SLOWLY add cornstarch slurry in a steady stream while whisking constantly to prevent the slurry from sinking to the bottom of the pan. Once incorporated, return pan to medium heat and bring to a rolling boil. Remove from heat.
    Pour about two tablespoons of the hot mixture into the cream cheese. Whisk vigorously until completely smooth. Add a little more cream mixture and whisk. Add the rest of the cream mixture and stir until incorporated. Add salt and mix until well blended (about a minute).Pour entire mixture into a heatproof plastic bag (Ziplock) and get all the air out (to prevent a film forming). Close tightly and submerge in an ice bath until completely chilled, about 30 minutes.
    Freeze in an ice cream machine according to manufacturer’s directions.Quickly remove ice cream from machine to a bowl with tight fitting lid. Get it into your freezer asap and freeze for at least four hours.If it becomes too hard to scoop, temper the ice cream for a few minutes at room temperature or in the refrigerator before serving.


    LinkWithin

    Related Posts with Thumbnails